One square master, then every size the two toolchains ask for
Shipping to both stores means producing a lot of near-identical PNGs. iPhone wants several point sizes at 2x and 3x and iPad wants them at 1x and 2x, covering the home screen, Spotlight and Settings; the App Store wants its own 1024 pixel marketing icon; Android wants a legacy launcher icon and a modern adaptive-icon foreground layer at five separate density buckets. Doing that by hand is not hard, it is just long, and the failure mode is silent: one filename that does not match the manifest and Xcode falls back to a blurry upscale or a build step fails on a missing asset.
- Pick your artwork with the Upload a square-ish logo or app icon (1024×1024px or larger works best) control.
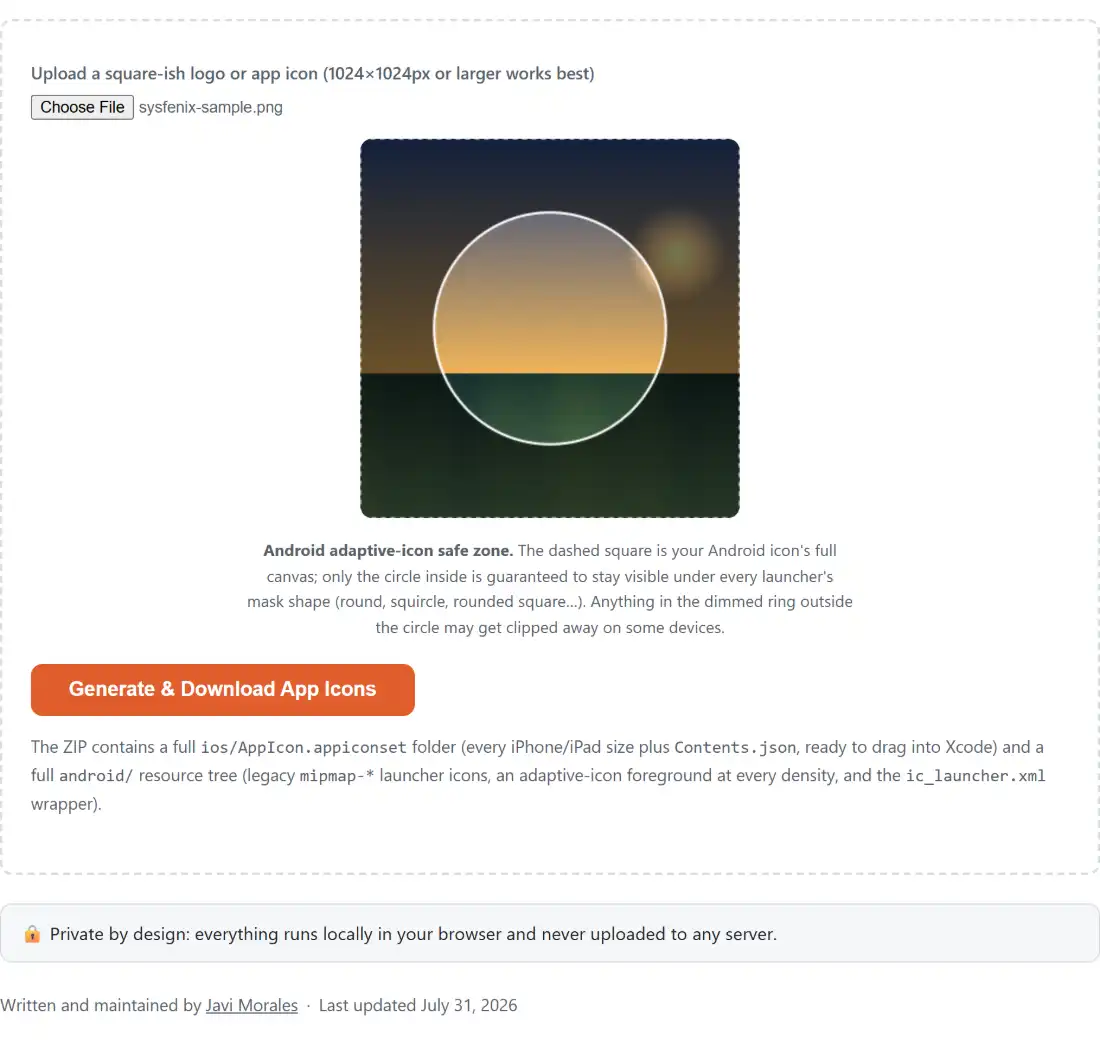
- Look at the preview that appears. Everything inside the bright circle survives every launcher mask; the dimmed ring around it may be clipped.
- If detail you care about sits in the dimmed ring, go back to your design tool, add padding around the mark and upload the new export.
- Click Generate & Download App Icons and wait for the percentage in the button to reach the end.
- Unzip, drag
ios/AppIcon.appiconsetinto your Xcode asset catalogue, and copy the contents ofandroid/into your project’s resource directory.
Everything after the upload happens in the page. The image is decoded to a bitmap, centre-cropped to its largest square at full native resolution, and every single output size is then drawn from that one sharp square rather than from a chain of successive resizes, so quality loss never compounds.
The dimmed ring is where launchers actually cut
Android’s adaptive icons are easy to get subtly wrong because two different numbers are floating around in the documentation and they are not interchangeable. Both layers are drawn on a 108dp canvas. The outer 18dp on each side is reserved for parallax and pulse effects, which leaves a 72dp masked viewport. Inside that viewport a mask may still come as close as 33dp to the centre, so the region genuinely guaranteed to survive any convex mask shape is a centred circle 66dp across. That circle leaves 21dp to each edge of the full canvas, not 18dp, and mixing the two up is how a logo mark ends up losing its outer stroke on somebody else’s phone.
The preview draws exactly that boundary at exactly that ratio over your own image, using a clipped fill so the safe region stays sharp rather than being tinted. It is a check you would otherwise only make by installing a build on a launcher whose mask differs from yours.
Where the ZIP’s files belong in your project tree
The iOS half is a complete AppIcon.appiconset folder: the rendered PNGs plus a real Contents.json listing every idiom, point size, scale and filename, in the full explicit form that every Xcode release understands rather than the newer single-image shortcut.
The Android half mirrors a resource tree. Each density bucket gets an ic_launcher.png legacy icon and an ic_launcher_foreground.png adaptive layer; mipmap-anydpi-v26/ic_launcher.xml is the adaptive-icon wrapper Android reads from API 26 upward, pointing at that foreground and at a colour resource; and values/ic_launcher_background.xml defines that colour.
The two decisions the package deliberately leaves to you
The background colour resource ships as plain white, because the tool has no way to know your brand colour and no free-text field to ask for one. If you want anything else behind the adaptive foreground, open that XML in a text editor and change the hex value. Every other file, from the iOS filenames to the manifest to the XML wrapper, is ready as generated.
The second decision is composition. The preview shows you what would be clipped, it does not fix it, and there is no automatic shrink-to-fit. That is a real limitation and also the right default: quietly rescaling somebody’s logo mark inside its canvas changes the design. If you need to pre-square a wide lockup with control over the framing, Crop Images trims a centred square before you bring it here, and Resize Images can take an oversized export down to a sane master width first.
Where this stops and the favicon package starts
An app icon set and a web favicon package overlap in spirit and share almost nothing in practice: different filenames, different sizes, a different manifest, and an .ico container that has no place in either store bundle. If the same mark also needs to appear in a browser tab, the Favicon Generator produces that package from the same square-crop pipeline, and PNG to ICO handles the multi-size .ico on its own when that is all you are missing.
One practical note from using this on a real project: generate the package early, while the logo is still open in your design tool. Discovering that a thin outer border sits in the dimmed ring is a two minute fix at that point and an annoying round trip a week later.