What a tracer can and cannot give you back
Vectorizing is not decompression. A PNG holds a grid of coloured squares and nothing else, so a tracer has to look at that grid, decide where one region ends and another begins, and invent smooth outlines that follow those boundaries. The output is a new drawing that resembles the input, not a recovered original.
That distinction decides whether this tool will help you. A two-colour logo, a screenshot of an icon, a scanned line drawing, a shape you need to cut on a vinyl plotter: all of these have hard boundaries between flat regions, and tracing them produces something genuinely usable at any size. A photograph of a face does not. It has no boundaries, only gradients, and the tracer will hand you a few hundred blobby paths that look like a badly printed poster.
Everything runs inside the page, including the tracing library itself, which is fetched only when you actually pick a file rather than on page load.
Tracing a logo and downloading it
- Click Upload a PNG or JPG to vectorize and pick your file. The picker offers PNG and JPEG only.
- Wait for the decode, then set Mode to Color or Black & white.
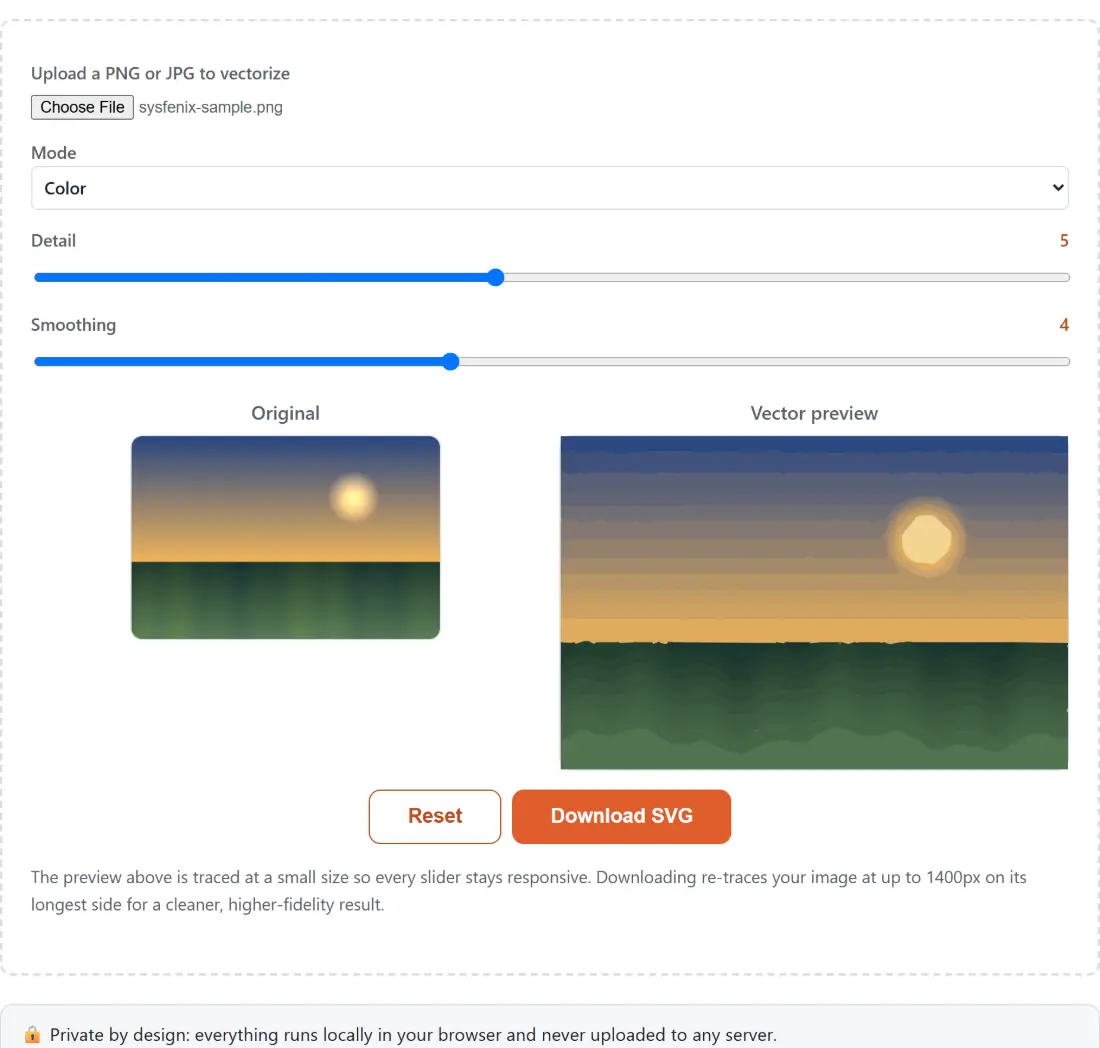
- Drag Detail anywhere from 1 to 10. It starts at 5, and the current value is shown beside the label.
- Drag Smoothing from 0 to 10. It starts at 4.
- Watch the right-hand Vector preview panel update against the Original panel on the left. Retracing waits a quarter of a second after you stop dragging, so a slider drag does not queue a dozen traces.
- Click Download SVG. The button reads Tracing full quality… while the higher-resolution retrace runs.
- If the browser does not start the download automatically, use the fallback link that appears next to the before and after byte sizes.
- Reset clears everything so you can start on the next file.
I keep the two panels side by side and change one slider at a time. Detail and smoothing interact, and moving both at once makes it very hard to tell which one caused the improvement.
Detail is three knobs wearing one label
Behind that single slider sit three separate tracer settings, all moved together.
The first is the minimum path length that survives at all. At detail 1 anything shorter than twenty pixels is discarded outright, which strips away speckle and leaves only major shapes. At detail 10 that floor drops to one, so almost nothing is thrown away, including the noise.
The second is curve fitting tolerance. It runs from 1.5 at the low end, where the tracer is happy to approximate an edge with a straighter line, down to 0.1 at the top, where it follows the pixel boundary closely. Tight fitting means more path data.
The third only applies in colour mode: the palette size, which climbs from two colours at detail 1 to sixty-four at detail 10, passing through thirty at the default of 5. This is why a low detail setting produces that flat, posterized look rather than merely a simpler one.
Smoothing is what you reach for when a photo explodes
Smoothing blurs a working copy of the image before tracing and, from step six upward, also switches on the tracer’s own line filtering pass.
The numbers are modest and deliberate. At zero there is no blur. At the default of 4 the blur radius is two pixels. At the maximum of 10 it reaches five pixels with a wider colour tolerance. That is enough to fuse JPEG compression artifacts and camera noise into flat regions, and not enough to soften a genuine corner into a curve.
If a trace comes back with a thousand tiny paths, raise smoothing before you lower detail. Lowering detail throws away real shapes along with the noise; smoothing removes the noise first so the real shapes survive.
After the trace
The downloaded SVG is honest but not tidy. Tracers emit a lot of redundant coordinate precision, and running the result through SVG Optimizer usually removes a meaningful chunk of it without changing how the file looks.
To go back the other way, or to produce a raster at a specific pixel size from the vector you just made, SVG to PNG handles it. For a traced silhouette destined to become a site icon at several sizes, Favicon Generator is the next step, and Sticker Maker adds an outline around a cut-out shape. Everything else is on the image tools hub.