README Generator

Fill in a short form and get a clean README.md with working badges and a live preview. Sections you leave blank never appear. Your draft stays local.

🌐 Español

Badges

No badges yet — add one below.

Markdown source

Live preview

🔒 Private by design: everything runs locally in your browser and never uploaded to any server.

A form that produces a file people will actually read

A README is the first thing anybody sees and the last thing most people write. The result is predictable: a title, two lines of description, and nothing about how to install or run the thing.

The fix is not a longer template. It is a short form that asks for the things a reader needs and then omits everything you left blank, so the output is a clean short document rather than a long one full of empty headings.

Everything updates as you type, with the raw Markdown in one panel and its rendered form in the other. What you see in the preview is what will appear on the repository page, because the renderer is the same one this site uses for its own Markdown conversion.

Filling in the form

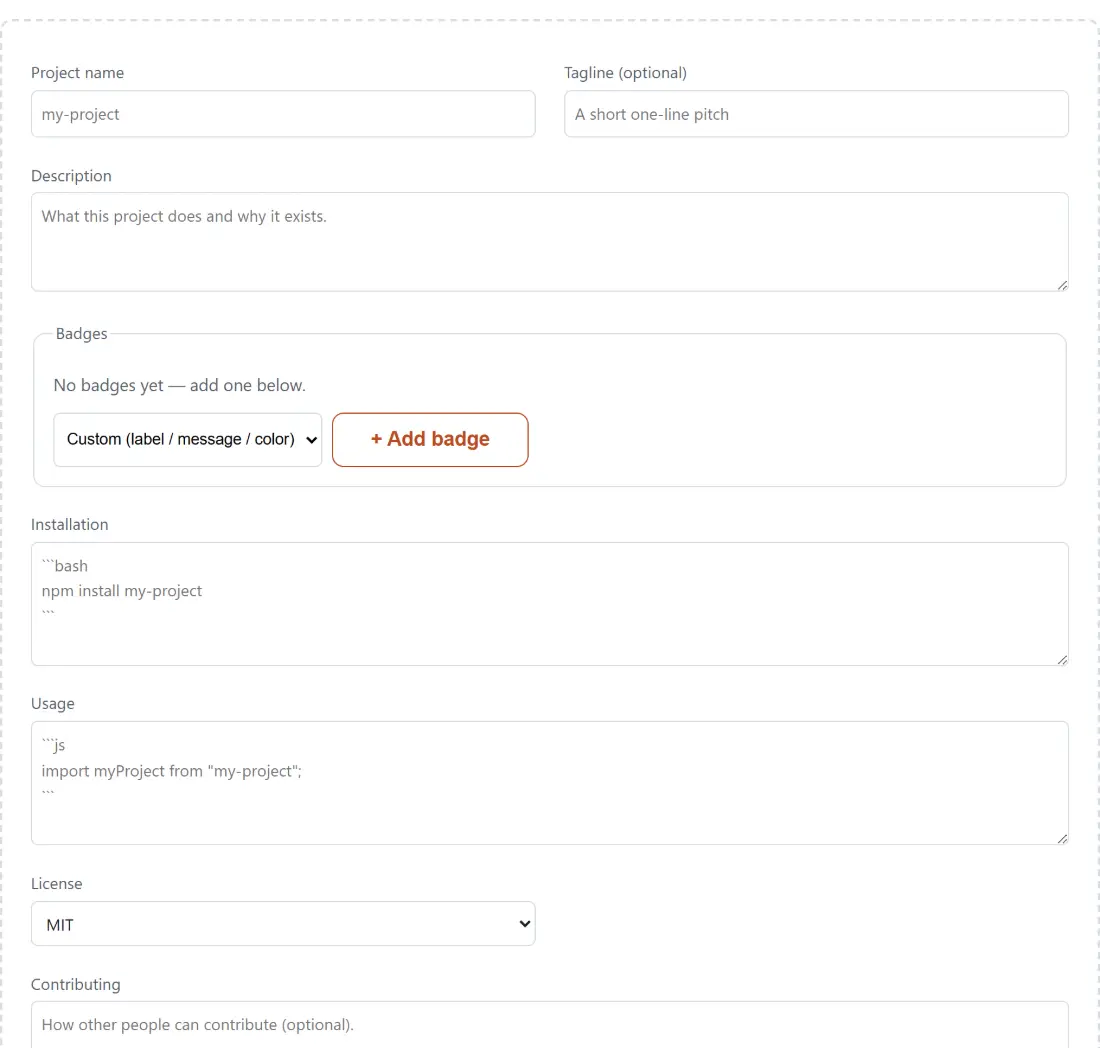
  1. Type a Project name. Leave it blank and the title falls back to a visible placeholder.
  2. Add a Tagline (optional), which is rendered in italics under the title.
  3. Write a Description covering what the project does and why it exists.
  4. Add badges under the Badges section. Each one has a kind, and the fields change to match it.
  5. Fill in Installation and Usage. Both accept Markdown, so fenced code blocks work.
  6. Pick a License from the dropdown.
  7. Write Contributing if you want it, or leave it blank and the section will not appear.
  8. Use Copy Markdown to take the source, or Download README.md to save the file.

The two code sections are where most of the value is. A reader who cannot work out how to install and run your project will not read anything else you wrote.

Badges that resolve

Badges are the part people copy from another project and then leave pointing at the wrong repository. Building them from a form avoids that, and the five kinds cover what most projects actually use.

A custom badge takes a label, a message and a colour and produces a static badge. The text is escaped according to the service’s own documented rules for that path, so a dash or an underscore in your label produces the character you meant rather than breaking the URL.

A license badge is generated from your license selection, with a sensible default colour per license. An npm version badge reads the current published version. A build status badge points at a GitHub Actions workflow. A stars or forks badge shows the live count.

Each badge can carry an optional link, so clicking it goes somewhere useful, which is the difference between a badge and a decoration.

Licenses, and the one that is not a license

Four real licenses are offered, each with its correct SPDX identifier: MIT, Apache 2.0, GPL 3.0 and BSD 3-Clause. Those identifiers matter because tooling reads them, and an invented shorthand fails silently.

The fifth option is none, meaning all rights reserved. It is deliberately not treated as a license: it produces no license section and no identifier at all, rather than fabricating one. That is the honest behaviour for a project that has not chosen yet, and it is a visible reminder that the choice still has to be made.

Selecting a license here writes a section into the README. It does not create a LICENSE file, which is a separate document your repository still needs.

Headings in English, content in yours

The four section headings are fixed English strings. That is a deliberate decision rather than an oversight.

Installation, Usage, License and Contributing are what the ecosystem expects. GitHub, the package registries and contributors arriving from anywhere in the world all look for those words, and a project whose README uses them is easier to navigate even when everything under them is written in another language.

Everything that is actually yours is free text. The project name, the tagline, the description and all three section bodies can be written in whatever language your project uses.

The rest of the repository furniture

Gitignore Generator produces the ignore file for your stack, which is the other file every new repository needs on day one.

For tables inside the README, Markdown Table Generator builds the alignment syntax so you do not have to count pipes. Markdown to HTML converts the finished document if you need it as a web page, and DOCX to Markdown goes the other way when documentation already exists in a word processor. ASCII Art Generator makes the banner some projects put at the top. The rest is on the dev tools hub.
See it in action

Screenshot of the README Generator tool with a README builder taking project name, tagline and description, with badges added from a list (npm version, GitHub Actions build status, stars and forks, or a custom label/message/colour) and a licence choice
README Generator mid-process: a README builder taking project name, tagline and description, with badges added from a list (npm version, GitHub Actions build status, stars and forks, or a custom label/message/colour) and a licence choice.
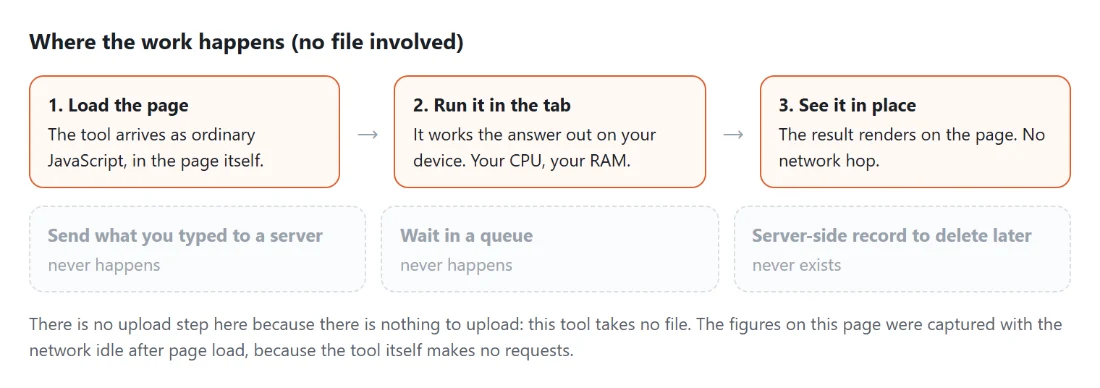
Diagram: where the work happens on a SysFenix page that has no file input at all: the tool arrives as ordinary JavaScript inside the page, works the answer out on your own device and renders it in place, so the upload, queue and server-side record a typical online tool needs never happen
Where the work happens on a SysFenix page that has no file input at all: the tool arrives as ordinary JavaScript inside the page, works the answer out on your own device and renders it in place, so the upload, queue and server-side record a typical online tool needs never happen.

Frequently asked questions

Do empty sections leave empty headings behind?

No. Every section other than the title is conditional on having real content, so leaving the contributing box blank produces no contributing heading at all rather than a heading with nothing under it. That is the single most common defect in generated READMEs and it is specifically prevented here.

Are the badge URLs real?

Yes, they are built against the documented shields.io URL shapes rather than guessed. The five kinds cover a custom label and message pair, a license badge, an npm version badge, a build status badge from GitHub Actions, and a stars or forks count. Text going into a custom badge is escaped according to the service's own rules, so a dash or an underscore in your label does not break the path.

Which licenses are offered?

MIT, Apache License 2.0, GNU GPL v3.0 and BSD 3-Clause, each with its real SPDX identifier, plus a none option. That last one is not a license; it represents all rights reserved, and it deliberately produces no license section and no identifier rather than inventing one that does not exist.

Why are the section headings always in English?

Because that is the de facto convention in open source. Installation, Usage, License and Contributing are what GitHub, the package registries and most international contributors expect to see, even in projects whose prose is written in another language. Everything you type underneath those headings is yours and can be in any language you like.

How does the preview work?

It renders your Markdown with the same renderer this site uses for its own Markdown to HTML conversion, including its sanitising step, rather than a second parser bolted on. That means the preview behaves consistently with the rest of the site and cannot be used to inject anything into the page.

Is my draft saved?

In this browser's local storage on this device, so coming back later finds your project details, badges and section text still in place. Nothing is uploaded and there is no account. Clearing site data removes it, and a corrupt stored value is discarded rather than breaking the form.

Can I paste code blocks into the sections?

Yes, the installation and usage boxes take Markdown, and their placeholder text shows a fenced code block as the expected shape. Whatever you type is inserted verbatim under its heading, so fenced blocks, lists and links all work exactly as they would if you had typed them into the file yourself.

What do I get at the end?

The Markdown source in one panel and its rendered preview in another, plus a copy button and a download that produces a file named README.md. Nothing else is generated, so a project needing a license file, a contributing guide or a code of conduct still needs those written separately.

What if I leave the project name blank?

The title falls back to a placeholder rather than emitting an empty heading, so the document is always valid Markdown. It is obviously a placeholder, which is the point, since a README whose first line is wrong is worse than one that is visibly unfinished.

Related tools