Seven tools on a 1200 by 700 board
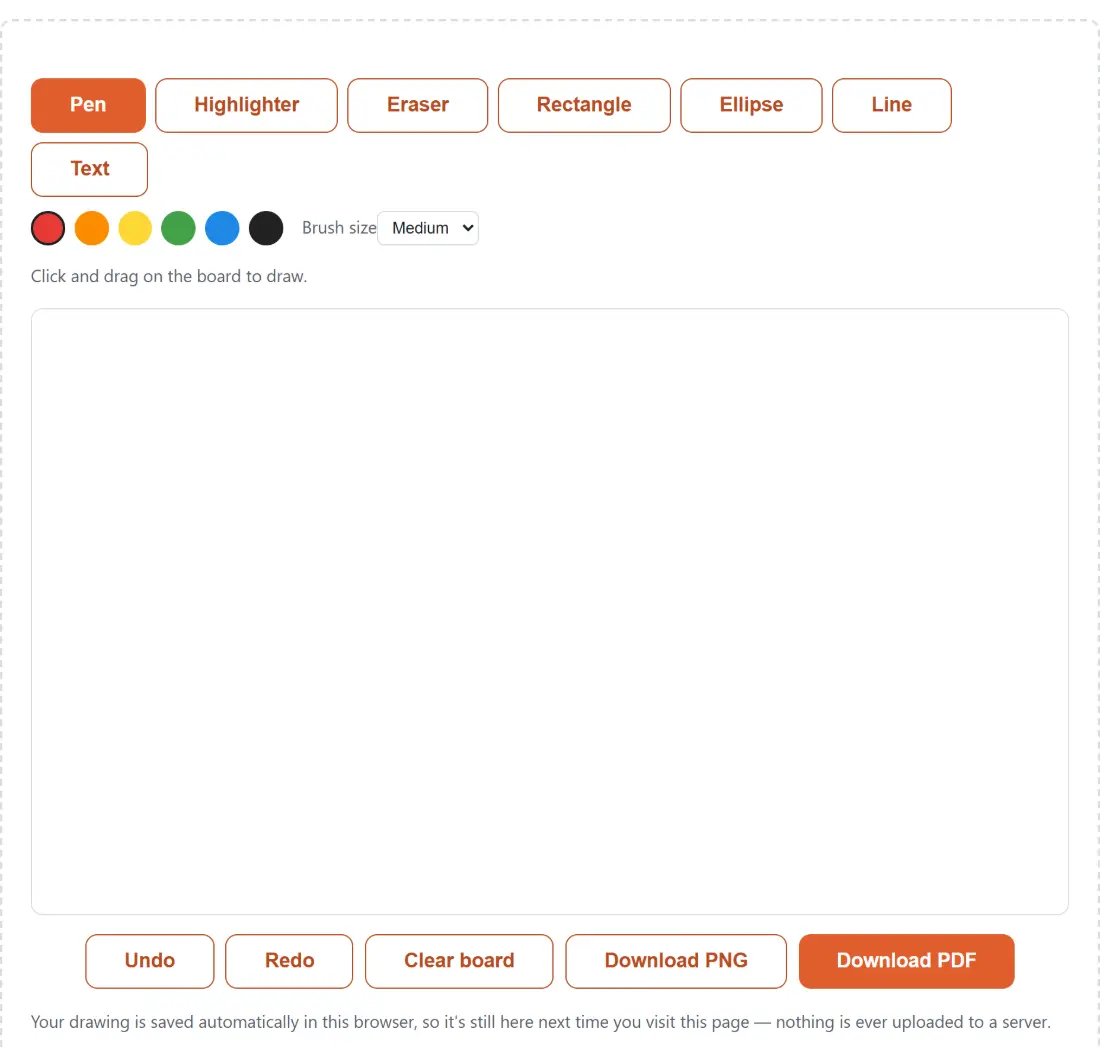
The toolbar holds Pen, Highlighter, Eraser, Rectangle, Ellipse, Line and Text, and that is the whole set. No arrows, no polygons, no sticky notes. Six colours sit underneath, the same palette this site uses for screenshot markup, with red selected on arrival, and the swatches disappear while the eraser is active, since an eraser has no colour to choose.
Brush size is a three way choice, thin, medium or thick, at 3, 6 and 12 pixels. Those numbers are measured on the board’s own grid, which is a fixed 1200 by 700 pixels no matter how large the canvas is being displayed. On a phone, where the board is scaled down to fit the screen, a medium stroke therefore looks proportionally thinner than it does on a desktop; it is the same stroke, and the exported file proves it.
Text works differently from everything else. Type your label into the box that appears when you pick the tool, then click where it should go, and it is drawn at a fixed 24 pixels with the click point as its top left corner. Up to 200 characters go in at a time. Click the board with the box empty and a hint appears asking you to type some text first, which is one of the few places this widget talks back to you.
An eraser that paints white, deliberately
The obvious way to build an eraser on a canvas is to punch a hole in it with a destination-out composite. This one does not. It draws a stroke in the board’s own background white, because every repaint replays the element list from scratch over a fresh white fill, and a real hole would let whatever sits behind the canvas element show through, then export as transparency in the PNG. A whiteboard that develops see-through patches when you print it is not a whiteboard.
Painting white instead has a consequence worth knowing, and it is the one people notice: erasing is itself an element in the list. It sits in the stack alongside your strokes, undoes like any other action, and covers only what was drawn before it.
Two history stacks, and what survives a reload
Undo and redo run on a proper two stack model rather than a single undo buffer. Every committed element pushes a snapshot of the previous drawing onto the past stack and clears the redo stack, which is the invariant naive implementations get wrong: undo, redo, then draw something new, and the old redo path must be gone. Clear board goes through the same machinery, so it lands on the undo stack too, and one press of Undo brings the whole drawing back. Both stacks are capped at 100 snapshots so a long session cannot grow without limit.
Persistence is separate and narrower. About four tenths of a second after your last edit, the current drawing is written to this browser’s local storage as element data, coordinates, colours and widths, not as a rendered image. Reloading rebuilds the board from that data, which is why the result is still fully editable rather than a flattened picture, and why a single corrupted entry is dropped instead of taking the whole board down with it. The undo history is not part of that payload.
From blank board to a downloaded file
- Pick a tool from the toolbar, then a colour swatch and a Brush size.
- For Pen, Highlighter, Eraser, Rectangle, Ellipse and Line, press on the board and drag. A live preview follows the pointer, and letting go, or dragging off the edge of the canvas, commits the element. A shape drag shorter than about four pixels is treated as a stray click and discarded.
- For Text, type the label first, then click the board where you want it.
- Step backwards and forwards with Undo and Redo, or wipe the board with Clear board, which stays undoable.
- Press Download PNG or Download PDF. The file is timestamped, saves itself, and a fallback link appears underneath in case the browser blocked the automatic download.
PNG at board size, PDF at 1200 by 700 points
The PNG is the canvas exactly as it stands, 1200 by 700 pixels, on a solid white background rather than a transparent one. The PDF wraps that same PNG in a single page sized to match it point for point, using the same placement helpers as this site’s other image to PDF converters, which means the scale factor works out at exactly one and the drawing is never shrunk to fit a smaller sheet. Both filenames carry the local date and time, which makes a folder full of quick sketches sortable without renaming anything.
If A4 is what you actually need, the tidiest route is to download the PNG and pass it to PNG to PDF, which offers A4 and Letter pages and will combine several boards into one document.
A sketchpad, not a design tool or a shared canvas
There is no multiplayer here. Real time collaboration means a server relaying every stroke between participants, and this whole site is built the other way round, so what you get instead is a board that opens instantly, asks for nothing, and keeps your drawing on your own machine. For screen sharing on a call that is usually enough.
Three neighbours cover the jobs this one deliberately does not. If you already have an image and want to mark it up, annotate a screenshot puts arrows, boxes, numbered steps and a blur tool over your own file. If you want crisp grid art rather than freehand lines, the pixel art maker works cell by cell on an 8 by 8 up to 32 by 32 grid and exports with a transparent background. And if all you need is your name in ink, the signature generator draws or types one and hands back a transparent PNG. More drawing and image tools live on the image hub.