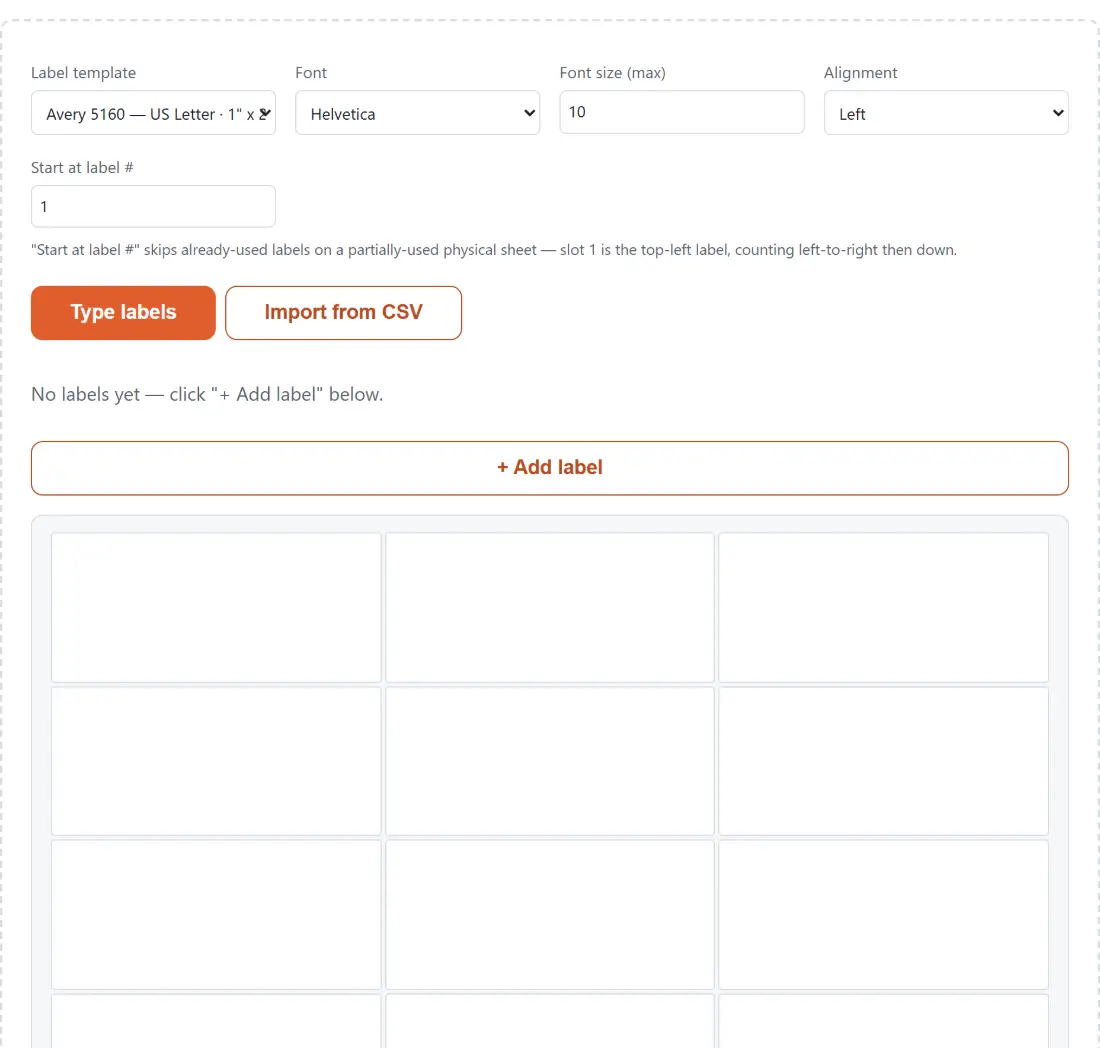
A sheet of labels is unforgiving. The paper is already die-cut, the slots are already in fixed positions, and text that lands two millimeters off center either straddles the cut line or prints on the backing. Word processors ship label wizards for this, but they hide the geometry behind a product-number dropdown that may or may not match the pack you bought. This page uses the published dimensions for five real Avery-family sheets and shows you the arithmetic.
Five grids, checked against the page they print on
Every template stores its label width, height, row and column count, margins and gaps, converted to PDF points at exactly 72 per inch. Then the numbers are made to reconcile: twice the side margin, plus every label width, plus every horizontal gap, has to add up to the real page width, and the vertical sum has to add up to the real page height.
For Avery 5160 that reads as 2 x 0.1875 + 3 x 2.625 + 2 x 0.125 = 8.5 inches across, and 2 x 0.5 + 10 x 1.0 = 11 inches down. The grid works out to exactly 612 by 792 points, which is US Letter to the point. Avery L7160 does the same on A4: 2 x 7.25 + 3 x 63.5 + 2 x 2.5 = 210 mm across and 2 x 15.15 + 7 x 38.1 = 297 mm down.
That check is not decoration. A widely mirrored open-source template file for the 7160 family declares a label size that cannot physically fit three columns on an A4 page, and it was rejected during research precisely because it failed this sum. The five templates on offer are 5160 and 8160 (30 address labels, 3 by 10, US Letter), L7160 (21 labels, 3 by 7, A4), 5163 (10 shipping labels at 4 by 2 inches, 2 by 5, US Letter) and L7163 (14 shipping labels, 2 by 7, A4).
Typing a handful or importing a list
Type labels mode gives you a stack of multi-line text boxes, one per distinct label, each with its own Copies count. That count is what makes a return-address sheet quick: write the block once, set Copies to thirty, and you have filled a 5160 sheet. A box you added and left blank contributes nothing to the output, so a stray empty row at the bottom never prints as a blank label.
Import from CSV mode reads a .csv or .tsv file and turns every row into its own label. The first row is always treated as the header, and the delimiter is detected rather than assumed, so a semicolon-separated export from a European spreadsheet locale is read correctly without any setting. By default the columns are joined in file order, one per line. To control the arrangement, type your own template with placeholders naming the columns:
{Name}
{Street}
{City}, {State} {Zip}
Placeholder matching ignores case and surrounding spaces, and a name that matches no column is replaced with nothing rather than printing a literal brace. If your addresses are still in a phone or CRM export, convert the VCF to CSV first, and open the result in the CSV Viewer if you want to check the column names before importing.
Building a sheet and downloading the PDF
- Choose the Label template that matches the pack in your printer. The preview grid underneath immediately redraws with that template’s slot count.
- Set Font, Font size (max) and Alignment. The five fonts are Helvetica, Helvetica Bold, Times, Times Bold and Courier, and the size box accepts 6 to 14.
- Pick a mode. In Type labels, press + Add label for each new block and set its Copies. In Import from CSV, choose your file under CSV file and optionally fill in the placeholder template.
- If the sheet in your tray already has labels peeled off, set Start at label # to the first free slot.
- Read the line under the preview, which reports the label count, the sheets needed and the labels per sheet, then press Generate PDF. The file downloads as labels-avery5160.pdf, or the equivalent name for whichever template you chose.
Starting part way down a used sheet
Slot 1 is the top left label. Numbering runs left to right along a row and then down to the next one, which is the physical order every Avery-family sheet is numbered in, so there is no across-or-down setting to get wrong.
Setting Start at label # to 5 leaves the first four slots of the first page blank and starts printing at slot five. Later pages always start at slot one, because by then you are feeding fresh sheets. Thirty labels starting at slot five on a 5160 therefore needs two sheets: twenty six on the partly used one and four on the next. The preview grid shades the slots that first sheet will use, so you can hold the physical sheet up to the screen before committing paper.
The trade-offs of drawing with built-in fonts
Everything is drawn with pdf-lib using the five standard PDF fonts, which is why the PDF is tiny, builds instantly and needs no font files. The cost is character coverage: these fonts carry the standard Latin set, so accented Western European names are fine while Greek, Cyrillic and CJK text is outside what they can encode. There is also no bold-a-single-line control, no image support and no per-label styling. Pick Helvetica Bold if you want the whole sheet bold.
If a plain grid of text is not what you need, other tools here cover the neighbouring jobs: the Certificate Maker also batches from a CSV but produces one designed page per row, and the Printable Calendar Generator is the equivalent for a dated wall sheet. The rest of the document tools live on the PDF tools hub.