Why practice paper has four lines and not one
Ordinary ruled paper offers a child a single line and no information at all about how tall a letter is supposed to be. Primary practice paper fixes that by describing the shape of the alphabet instead of just where to sit. Every row this generator draws has four rules: a light top line, a dashed line through the middle, a heavier solid baseline in a stronger blue, and an optional dashed fourth line below the baseline.
Those rules divide the row into three bands of exactly equal height. The top band is the ascender space, where capitals and the tall lowercase letters (l, h, b, d, k, t) reach up. The middle band, between the dashed midline and the baseline, is the x-height band where a, c, e, o, s and their relatives live entirely. The band below the baseline is for descenders: g, j, p, q, y. That 1:1:1 proportion is the convention Zaner-Bloser style ruled paper has used for decades, and it is what makes an instruction like “tall letters touch the top line, round letters stay below the dashes” mean something geometric rather than vague. If a child is past letter formation and simply needs paper to write on, switch the descender line off, or use the Graph & Lined Paper Generator for plain ruled sheets.
Words and sentences mode versus name tracing mode
These two modes look similar in the options panel and behave completely differently. Words & sentences takes the whole block of text you type and gives each non-blank line its own practice row, so a parent can put Monday’s five spelling words, or five short sentences, on one sheet. Name tracing takes a single name and repeats that same name down every row of one page. Seeing and tracing the identical word twenty or thirty times is the point of that sheet, so it does not paginate and it never mixes in anything else.
The two modes also produce differently named files, handwriting-practice-worksheet.pdf and name-tracing-practice.pdf, and the name sheet puts the name into the page title so a stack of sheets for different children stays sortable.
Choosing a line size, and what it costs you
The line size option sets the row height directly: 42, 60 or 84 points. Everything else follows from it. The drawn font size is 55 percent of the row’s combined ascender and x-height span, so a medium row writes at about 22 points and a large row at about 31. The number of rows follows too, because the page has fixed 50 point margins and reserves 40 points for the title. On A4 that leaves room for 12 small rows, 9 medium rows or 7 large rows.
Our recommendation is to go one size larger than feels necessary. Cramped rows are the single most common reason a practice sheet gets abandoned halfway down the page, and a 7 row large sheet finished properly is worth more than a 12 row small sheet with three rows of scribble at the bottom.
Making a sheet
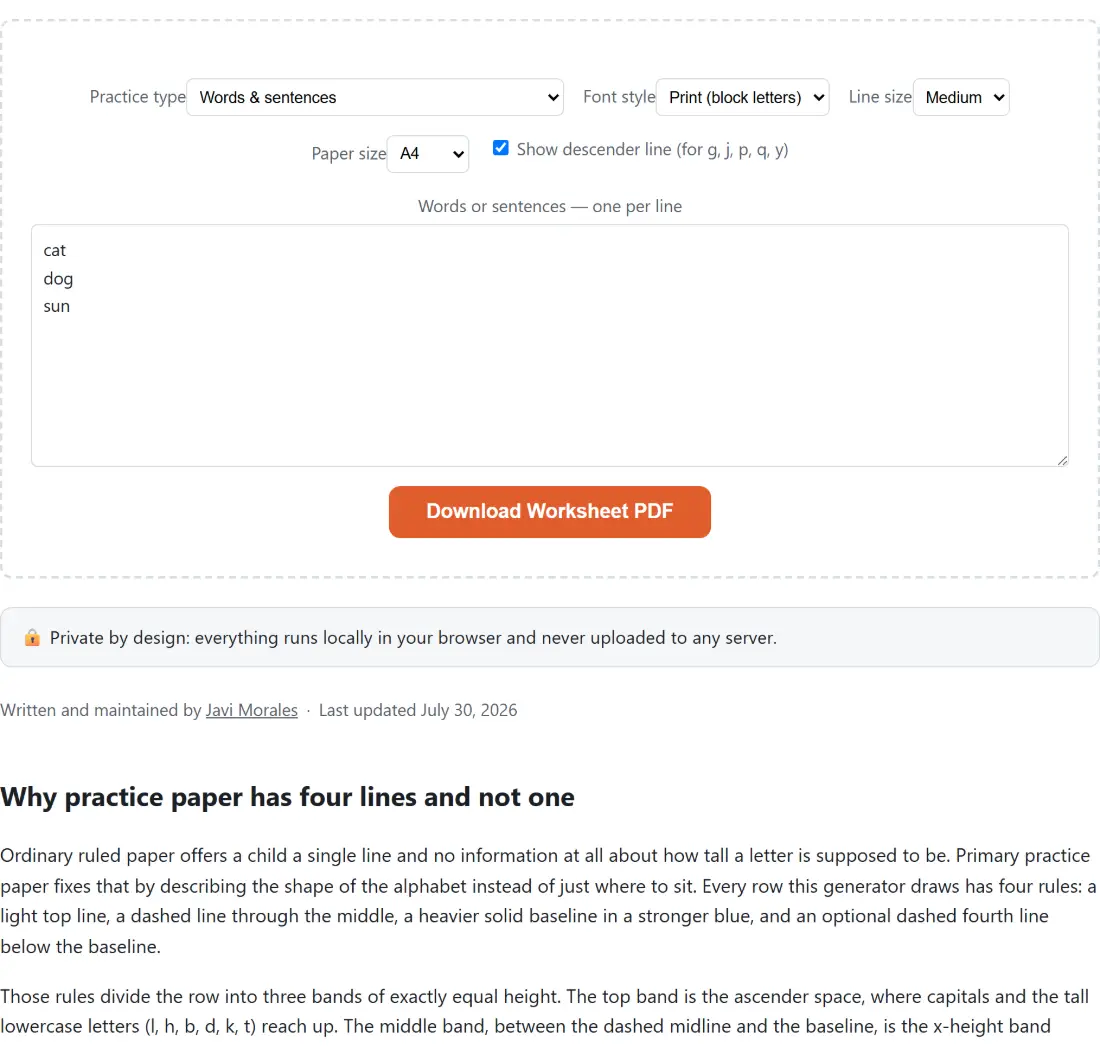
- Choose Words & sentences or Name tracing (repeat one name down the page).
- Type your list (one word or short sentence per line) or the single name to trace.
- Set Font style, Line size and Paper size, and decide whether the descender line is on.
- Click Download Worksheet PDF. The file lands in your downloads folder ready to print at 100 percent scale.
Why the trace letters are grey rather than dotted
Almost every commercial worksheet uses hollow dotted letters, and this tool cannot. We read pdf-lib’s own text drawing options before designing this: it exposes a colour and an opacity for drawn text and nothing else, with no dashed-outline or stippled glyph mode anywhere in the library. So the trace copies are drawn in a pale grey while the first copy on each row is drawn in near-black as the model to look at. A child does exactly the same thing with either version, which is to write over the pale letters.
Each row then packs in as many copies as genuinely fit. Repeats are separated by a gap of 45 percent of the font size, and the row stops before a copy would overrun the right margin, with a hard ceiling of ten. Short words hit that ceiling: “cat” at a medium line size measures about 29 points wide in Helvetica, so a dozen copies would fit inside the 495 points of usable width on A4, and the cap is the only thing stopping the row from turning into wallpaper.
Print is real text, cursive is a picture
Print mode draws with Helvetica, one of the fourteen fonts every conforming PDF reader must have built in, so the letters in the saved file are genuine selectable vector text at any zoom level. Cursive mode uses Dancing Script, one of four self-hosted script faces this site already ships for Text to Handwriting and the Signature Generator.
Getting an arbitrary font file into a PDF as real text requires fontkit, which this project deliberately does not depend on, so cursive pages take the other route: each page is drawn onto an offscreen canvas at twice PDF resolution using the real loaded web font and embedded as a full-page PNG. Printed side by side you cannot tell. The differences only surface in a reader (nothing is selectable) and in file size (a rasterised page is several times heavier than a vector one). For a joined-up handwriting model in particular this is worth knowing, because Dancing Script is a slanted script face rather than a true connected teaching hand, so it is a stylistic cursive rather than a formal one.